Fleischmann active dry yeast bread recipe, nih, resep yang bikin roti empuk dan nagih banget. Rasanya pasti bikin ngiler, sampai pengen nyicipin langsung! Kita bakal bahas mulai dari sejarah ragi Fleischmann sampai trik-trik bikin roti yang sempurna. Siap-siap, ya, karena kita bakal ngebahas semuanya dengan detail dan jelas!
Dari bahan-bahan yang tepat, teknik ngaduk dan nguli yang pas, hingga cara proofing dan memanggang yang benar, semua bakal dibahas tuntas di sini. Jadi, siapapun yang mau bikin roti enak, pasti bakalan dapet ilmunya di sini. Jangan sampai ketinggalan, ya!
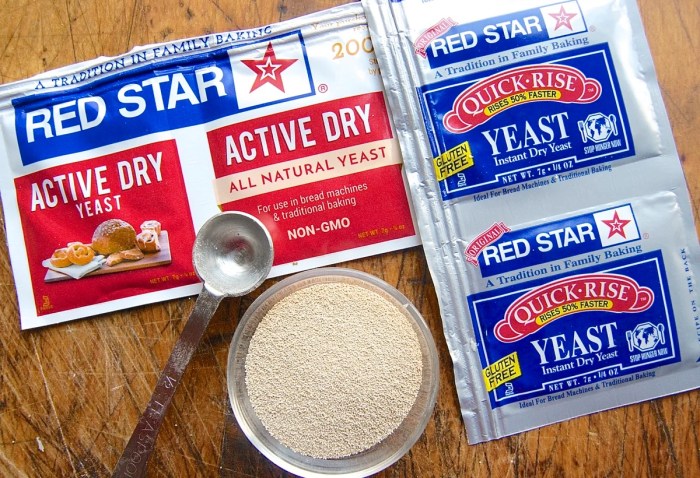
Introduction to Fleischmann Active Dry Yeast Bread
Fleischmann’s active dry yeast, a cornerstone of home baking, has a rich history intertwined with the evolution of bread-making techniques. Its widespread availability and consistent performance have cemented its position as a trusted choice for bakers worldwide. This comprehensive look into Fleischmann’s active dry yeast will explore its historical significance, its critical role in bread production, and the characteristic qualities of breads leavened with this popular yeast.Active dry yeast is essential for achieving the light, airy texture we associate with traditional bread.
Its ability to ferment dough, producing carbon dioxide gas, is fundamental to the rising process. This process not only creates volume but also contributes to the complex flavors and aromas that define baked goods.
Historical Significance of Fleischmann’s Yeast
Fleischmann’s yeast, first produced in the late 19th century, revolutionized home baking. Before the advent of active dry yeast, fresh yeast, requiring careful handling and refrigeration, was the standard. The development of active dry yeast allowed for easier storage and transport, making bread-making more accessible and convenient for the average household.
Significance of Active Dry Yeast in Bread Making
Active dry yeast, unlike its fresh counterpart, is deactivated by drying, which allows for extended shelf life. When rehydrated, the yeast quickly resumes its fermentation activity. This characteristic makes it a reliable and efficient leavening agent for various bread recipes. The controlled fermentation process results in a predictable and consistent rise, crucial for achieving the desired texture and quality in baked goods.
Characteristics of Bread Made with Fleischmann’s Yeast
Breads made with Fleischmann’s active dry yeast typically exhibit a light and airy crumb structure. The even distribution of carbon dioxide during fermentation creates a tender and soft texture. The flavor profile often leans toward a slightly tangy, subtly sweet characteristic. The consistent quality of Fleischmann’s yeast contributes to the reliability of the bread’s overall appearance and taste.
Comparison of Yeast Types
Understanding the differences between active dry yeast, instant yeast, and fresh yeast is crucial for choosing the right leavening agent for your baking needs.
| Yeast Type | Characteristics | Advantages | Disadvantages |
|---|---|---|---|
| Fleischmann’s Active Dry | Reactivates quickly when rehydrated, long shelf life | Convenient, affordable, long storage, reliable performance | Requires rehydration and activation time |
| Instant Yeast | Dissolves directly into the dry ingredients, no separate rehydration needed | Faster rising time, simple incorporation into the recipe | Less shelf life compared to active dry, can be more expensive |
| Fresh Yeast | Requires refrigeration, a wet, moist consistency | Stronger flavor and more complex fermentation profile | Shorter shelf life, more delicate handling, requires specific storage |
The table above highlights the key differences in storage, activation, and performance between the various yeast types. This information empowers bakers to make informed decisions about which yeast to use for specific recipes.
Ingredients and Measurements: Fleischmann Active Dry Yeast Bread Recipe
Mastering the art of bread-making with Fleischmann’s active dry yeast hinges on precise ingredient measurements and understanding the role of each component. This section delves into the essential ingredients, their significance, and how accurate measurements contribute to a perfectly risen loaf. Furthermore, it explores variations in recipes using Fleischmann’s yeast, from classic white bread to flavorful whole wheat options.Accurate ingredient measurements are crucial for achieving the desired texture and rise in bread.
Slight variations in the quantities of flour, water, yeast, and other ingredients can significantly impact the final outcome, affecting the bread’s structure, taste, and overall quality. Understanding the precise ratios allows you to consistently produce delicious, fluffy loaves.
Common Ingredients
The fundamental ingredients in a Fleischmann’s active dry yeast bread recipe are flour, water, yeast, sugar, and salt. Flour provides the structure, water acts as a binding agent, yeast is responsible for the leavening, sugar feeds the yeast, and salt enhances flavor and strengthens the gluten structure. Each ingredient plays a vital role in the overall outcome.
Importance of Accurate Measurements
Precise measurements are critical for predictable results. Slight variations in the amount of any ingredient can impact the bread’s texture, rise, and flavor. For example, too little water can result in a dry, tough loaf, while too much can lead to a sticky, uneven dough. Similarly, inadequate yeast or sugar can result in a flat loaf with insufficient rise.
Variations in Bread Recipes
Fleischmann’s active dry yeast can be used to create a wide array of bread varieties. Beyond the basic recipe, exploring variations like whole wheat bread, sourdough, and enriched breads opens up a world of flavor possibilities.
Whole Wheat Bread
Whole wheat bread utilizes whole wheat flour, adding fiber and nutrients to the recipe. The slightly higher protein content in whole wheat flour necessitates adjustments to the water content to achieve optimal dough consistency.
Sourdough Bread
Sourdough bread utilizes a starter culture, a combination of flour and water, that ferments over time. This fermentation process develops unique flavors and textures. The sourdough starter introduces a complex ecosystem that produces specific acids and flavors, which significantly influence the taste and texture of the final product.
Enriched Breads
Enriched breads, such as cinnamon rolls or raisin bread, often incorporate additional ingredients like nuts, seeds, or dried fruits. These additions enhance the flavor profile and visual appeal of the bread.
Ingredient Ratios for a Basic Recipe
The following table Artikels typical ingredient ratios for a basic Fleischmann’s active dry yeast bread recipe. Remember that these are guidelines, and adjustments may be necessary based on specific flour types or desired results.
| Ingredient | Typical Ratio (per loaf) |
|---|---|
| Flour | 3 cups (all-purpose) |
| Water | 1 3/4 cups (lukewarm) |
| Active Dry Yeast | 2 1/4 teaspoons |
| Sugar | 1 tablespoon |
| Salt | 1 teaspoon |
Mixing and Kneading Techniques
Transforming a collection of ingredients into a cohesive dough is crucial for achieving a delicious and well-structured loaf. Proper mixing and kneading techniques, specific to the type of yeast used, are essential for developing the gluten network, which gives the bread its characteristic texture and rise. This section delves into the steps involved in mixing and kneading Fleischmann’s active dry yeast bread dough, highlighting different methods and their impacts.Effective kneading develops gluten, a protein network in wheat flour that traps gases produced during fermentation.
This network is responsible for the bread’s structure and allows it to rise and hold its shape. The strength and elasticity of this gluten network are directly influenced by the kneading process. Different kneading methods produce doughs with varying characteristics, affecting the final bread product’s texture and overall quality.
Mixing the Dough
The mixing process is where the yeast begins to activate and transform the ingredients into a cohesive dough. Begin by combining the warm water, sugar, and yeast in a large bowl. Allow this mixture to stand for a few minutes to allow the yeast to bloom, which indicates it’s active and ready to ferment. Gradually add the flour, ensuring you incorporate it thoroughly.
Mix the ingredients until a shaggy dough forms.
Kneading Methods
Different kneading methods impact the gluten development and the final bread texture. Hand kneading is a traditional method that allows for a more tactile experience and helps develop a deeper understanding of the dough’s consistency. Stand mixers, on the other hand, provide a more consistent and efficient kneading process.
Hand Kneading
Hand kneading involves repeatedly folding, pushing, and turning the dough on a floured surface. This process develops the gluten structure, strengthening the dough and making it more elastic. The gluten development is enhanced by the continuous manipulation of the dough. Consistent kneading is essential to create a well-developed gluten network, resulting in a more airy and flavorful loaf.
The simple act of crafting Fleischmann active dry yeast bread awakens a profound connection to the earth’s nurturing essence. This ancient art form, much like the subtle transformation of ibd gel nails vs acrylic , reminds us of the potent alchemy within ourselves. The rising dough mirrors the inner growth, the final loaf a testament to the spiritual journey, a tangible symbol of the potential within.
Stand Mixer Kneading
Stand mixers offer a more efficient and consistent kneading process. A step-by-step guide for kneading dough using a stand mixer is presented below:
- Place the dough hook attachment into the stand mixer.
- Add the mixed ingredients to the bowl.
- Begin kneading on a low speed, gradually increasing the speed as the dough becomes more cohesive.
- Knead the dough until it is smooth and elastic, typically around 5-7 minutes.
- Observe the dough’s texture and adjust the kneading time as needed.
Importance of Proper Dough Handling, Fleischmann active dry yeast bread recipe
Handling the dough gently during mixing and kneading is critical to avoid over-developing or damaging the gluten network. Over-kneading can result in a tough, dense loaf, while under-kneading can lead to a weak structure that collapses during baking. Proper handling and techniques contribute to a well-risen and textured bread.
Effects of Different Kneading Methods
| Kneading Method | Effect on Dough | Final Product Texture |
|---|---|---|
| Hand Kneading | Develops a strong gluten network, imparting a chewy texture. | Chewy, with a slightly coarse crumb |
| Stand Mixer Kneading | Creates a consistent and efficient gluten development. | Soft, tender crumb, with a more even texture. |
Proofing and Shaping the Dough
Proofing is a crucial step in breadmaking, allowing the yeast to develop and the gluten to relax, resulting in a light and airy final product. Proper proofing and shaping techniques are essential for achieving a desired bread texture and form. Understanding the factors that influence proofing time and the various shaping methods will help you create delicious and impressive loaves.
Proofing the Dough: Understanding the Process
Proofing, also known as rising, is the stage where the yeast in the dough consumes sugars and releases carbon dioxide, creating the characteristic volume and texture of the bread. Factors like temperature, humidity, and the type of yeast used significantly impact the proofing time. A consistent environment is key to achieving predictable results.
Factors Affecting Proofing Time
Several factors influence how long the dough takes to proof. Understanding these factors is vital for adjusting your proofing process to achieve optimal results.
- Temperature: Warmer temperatures generally speed up the proofing process. A kitchen at 75-80°F (24-27°C) is ideal for most bread recipes. Lower temperatures will slow the proofing, while extremely high temperatures can cause the dough to rise too quickly and become tough.
- Humidity: High humidity levels create a moist environment that helps the dough rise evenly. A slightly humid environment helps the dough retain moisture during proofing, preventing it from drying out. Conversely, very low humidity can cause the dough to dry and become tough.
- Yeast Activity: The freshness and viability of the yeast are critical. Using active dry yeast that’s been stored properly is essential for predictable results. Old or inactive yeast will result in slower or no rising.
- Dough Composition: The ingredients in the dough, such as the amount of sugar, flour type, and liquid, also influence the proofing time. A higher sugar content will feed the yeast more quickly, but may lead to a quicker proofing time and a denser final product.
Methods for Shaping the Dough
The shape of the bread is determined by the shaping method employed. Different techniques produce different visual aesthetics and textures.
- Basic Round Loaf: For a simple round loaf, gently gather the dough into a ball and place it in a lightly oiled bowl, seam-side up. Cover and allow to rise until almost doubled in size. Then, gently shape the dough into a round loaf. This method is straightforward and suitable for beginners.
- Baguette: A baguette requires a longer shaping process. After the dough has risen, it’s shaped into a long, narrow loaf. The stretching and folding steps are critical to developing the characteristic shape and texture.
- Pretzel: A pretzel’s unique shape is achieved by shaping the dough into a pretzel shape, scoring it, and then boiling it. The boiling step gives it the signature soft, chewy texture and golden-brown color.
Assessing Dough Readiness for Shaping
Determining when the dough is ready for shaping is crucial. Over-proofing can lead to a dense loaf, while under-proofing results in a loaf that won’t hold its shape.
A good rule of thumb is to gently press your finger into the dough. If the indentation springs back quickly, the dough is ready for shaping.
Proofing Time Table
The table below provides an estimate of proofing times for different types of bread, assuming optimal conditions.
| Bread Type | Estimated Proofing Time (at 75-80°F/24-27°C) |
|---|---|
| Basic Round Loaf | 45-60 minutes |
| Baguette | 60-90 minutes |
| Pretzel | 60-90 minutes (plus boiling time) |
| Wheat Bread | 60-90 minutes |
Baking Techniques
Transforming your dough into a golden-brown, perfectly baked loaf requires careful attention to baking techniques. Understanding the optimal temperature and duration, along with the nuances of different baking methods, is crucial for achieving a delicious result. The interplay of heat, time, and method dictates the final texture and flavor profile of your bread.Baking temperature and duration are directly linked to the desired crust and interior.
A well-controlled environment ensures even cooking and prevents issues like uneven browning or a dense crumb.
Optimal Baking Temperature and Duration
The ideal baking temperature for Fleischmann’s active dry yeast bread typically falls within the range of 375-425°F (190-220°C). Lower temperatures will result in a longer baking time and may lead to a denser, less appealing crust. Higher temperatures can lead to a quicker baking time, but may cause the crust to burn before the interior is cooked through.
The specific baking time varies based on loaf size and oven type, but generally ranges from 30 to 45 minutes. Crucially, monitoring the bread is essential, as ovens vary.
Different Baking Methods
Several methods can be employed for baking your bread. Each method offers unique benefits and may influence the final product.
The ancient wisdom of Fleischmann’s active dry yeast bread recipe whispers of a profound connection to the earth’s nourishing essence. This recipe, a timeless testament to the transformative power of simple ingredients, now finds resonance in your search for a new home, a sanctuary for your spirit in Everett, MA. Consider a fresh start in house for rent in everett ma , a place where the soul finds comfort, and the aroma of freshly baked bread, like that of Fleischmann’s recipe, fills your days with joy.
This new chapter is a testament to your inner strength, ready to nourish your soul as you craft culinary magic.
- Conventional Oven Baking: This is the most common method, utilizing a standard oven. Preheating the oven to the appropriate temperature is essential for even cooking. Place the loaf on a baking sheet for even heat distribution.
- Dutch Oven Baking: Utilizing a Dutch oven creates a moist, flavorful environment. The heavy, oven-safe pot traps steam, contributing to a crispy crust and a tender crumb. The Dutch oven method is particularly well-suited for achieving a beautiful crust and a tender interior.
Role of Oven Temperature in Achieving a Golden-Brown Crust
The oven temperature directly impacts the browning process. Higher temperatures generally result in a crispier, more pronounced golden-brown crust. A controlled temperature gradient ensures consistent heat distribution, contributing to a more even crust color. Consistent heat is essential to avoid hot spots and uneven baking.
Checking the Doneness of the Bread
Determining when the bread is fully baked is crucial. A few simple methods can be used:
- The Tap Test: Gently tap the bottom of the loaf. A hollow sound indicates that the bread is done. A solid sound means further baking is needed. This is a reliable technique to check for internal doneness.
- Internal Temperature: Use an instant-read thermometer to check the internal temperature of the bread. A temperature of 200-210°F (93-99°C) indicates that the bread is fully cooked.
Troubleshooting Common Issues

Baking perfect bread, even with the best recipe, can sometimes lead to unexpected results. Understanding common problems and their causes is crucial for achieving consistent success in your Fleischmann’s active dry yeast bread baking endeavors. This section will equip you with the knowledge to identify and resolve issues, transforming your baking experience from frustrating to fulfilling.
Flat Bread
Flat bread, often the bane of many bakers, can stem from various factors. Improper mixing techniques, inadequate proofing, or insufficient baking time can all contribute to a disappointing result. Understanding these potential causes allows for targeted solutions.
- Insufficient Yeast Activity: A key element in bread rising is active yeast. If the yeast isn’t properly activated or the temperature isn’t optimal during proofing, the dough won’t rise sufficiently. Ensure your yeast is fresh and use a thermometer to maintain the correct proofing temperature.
- Inadequate Mixing: A properly mixed dough is essential for even yeast distribution and optimal gluten development. Insufficient mixing can result in unevenly risen dough and flat bread. Ensure thorough mixing, incorporating all ingredients until a smooth and elastic dough is formed. Insufficient gluten development hinders proper expansion.
- Incorrect Proofing Time or Temperature: Proofing time and temperature are critical. Too short a proofing time won’t allow the yeast to fully activate and develop the dough’s volume. Conversely, excessively high or low temperatures can inhibit yeast activity. Aim for a consistent proofing temperature, and observe the dough’s rise to determine the appropriate proofing time.
Tough Bread
Tough bread can result from over-mixing or under-kneading the dough. These actions can affect the gluten development, leading to a dense and unpleasing texture. Furthermore, improper baking techniques can contribute to a tough outcome.
- Over-mixing: Over-mixing develops too much gluten, creating a tough and chewy texture. Aim for a smooth, elastic dough; over-mixing will result in a tough, dense final product. Gentle mixing techniques are crucial to develop the gluten in the desired manner.
- Insufficient Kneading: Proper kneading develops the gluten, which is essential for a soft and airy texture. Insufficient kneading can lead to a dense and tough bread. The kneading process is crucial to achieve a good structure.
- Too High Oven Temperature: An excessively high oven temperature can cause the crust to brown too quickly, while the interior remains underbaked, leading to a tough, dense loaf. Adjust the oven temperature according to the recipe and ensure the bread bakes evenly.
Common Issues and Solutions
| Problem | Possible Causes | Solutions |
|---|---|---|
| Flat Bread | Insufficient yeast activity, inadequate mixing, incorrect proofing time or temperature | Ensure fresh yeast, mix thoroughly, maintain correct proofing temperature and time |
| Tough Bread | Over-mixing, insufficient kneading, too high oven temperature | Mix gently, knead adequately, adjust oven temperature |
Variations and Enhancements
Elevating your basic Fleischmann active dry yeast bread recipe opens a world of flavorful possibilities. Beyond the fundamental recipe, incorporating herbs, spices, and nuts creates unique bread experiences, each with its own distinct character. This section details methods to effectively integrate these additions and how they impact the final product, covering everything from simple rolls to complex pizza dough.
Adding Herbs and Spices
Incorporating herbs and spices into your bread dough enhances the aroma and flavor profile. Finely chopped fresh herbs like rosemary, thyme, or oregano, or dried versions, can be incorporated directly into the dough. Ground spices such as cinnamon, nutmeg, or paprika can be added during the mixing stage. The key is to distribute the ingredients evenly throughout the dough for consistent flavor.
Consider the potency of the spices and adjust quantities accordingly. For example, a subtle hint of rosemary pairs well with a simple loaf, while a more robust spice blend like Italian seasoning might be better suited to a hearty roll.
Incorporating Nuts and Seeds
Nuts and seeds provide added texture and flavor to bread. Chopped nuts like walnuts, pecans, or almonds can be incorporated into the dough during the mixing stage, distributing them evenly throughout. Similarly, seeds like sesame, poppy, or sunflower can be sprinkled on top of the dough before baking. The addition of nuts and seeds will influence the final texture of the bread.
The crunch of the nuts adds a satisfying contrast to the soft interior.
Crafting Different Bread Types
Variations in bread types stem from modifications in the recipe, shaping, and baking techniques. The same basic dough can be transformed into various shapes and sizes, from rustic loaves to delectable rolls. Consider the intended use of the bread when making modifications.
Creating Rolls
For rolls, the dough can be divided into smaller portions and shaped into balls or rolls. Allow the rolls to rise, then bake until golden brown. The smaller size of the rolls results in a quicker baking time.
Making Pizza Dough
For pizza dough, a slightly different dough recipe may be required. The dough needs to be very pliable and elastic to stretch well. After mixing, the dough should be allowed to rest before being shaped. The dough should be rolled out to the desired thickness, topped with desired ingredients, and baked until the crust is golden brown and the toppings are cooked through.
Consider using a pre-made pizza dough recipe for a faster and more predictable result.
Troubleshooting Issues with Variations
If your bread is unevenly colored or has a different texture than expected, it may be related to the addition of specific ingredients. For example, certain nuts or spices may affect the browning process, so careful monitoring is crucial. Adjusting the baking time or temperature may be necessary to achieve the desired result.
Storage and Preservation
Extending the shelf life of your freshly baked Fleischmann’s yeast bread is crucial for maximizing enjoyment and minimizing waste. Proper storage methods play a significant role in maintaining the bread’s texture, flavor, and overall quality. Understanding the nuances of storage, from immediate cooling to long-term freezing, ensures your culinary creations are at their best.Proper storage is essential for preserving the quality and freshness of your bread.
Different methods are suitable for various timeframes, from immediate consumption to extended storage. Employing the right technique for the desired duration will ensure the best possible outcome.
Optimal Storage for Fresh Bread
To maintain the ideal texture and flavor of your freshly baked bread, immediate cooling is paramount. Cooling prevents the bread from becoming overly moist or stale too quickly. Allow the bread to cool completely on a wire rack before storing it. This crucial step prevents the bread from becoming soggy.
Storing Leftover Bread
Storing leftover bread correctly ensures its quality and freshness. The ideal method involves storing it in an airtight container at room temperature or in the refrigerator. Airtight containers help prevent the bread from drying out and absorbing odors. Refrigeration is best for longer storage periods.
Freezing Techniques for Long-Term Storage
Freezing allows for long-term storage of your yeast bread. Freezing techniques should be precise to maintain quality. Freezing bread in airtight containers, wrapped tightly in plastic wrap or aluminum foil, prevents freezer burn. To prevent freezer burn and maintain quality, place the bread in a single layer.
Freezing Bread for Different Timeframes
- Short-Term Freezing (Up to 3 Months): Wrap the bread tightly in plastic wrap or aluminum foil, then place it in a freezer-safe bag or container. This method minimizes exposure to air and moisture, preserving the quality of the bread.
- Long-Term Freezing (Over 3 Months): For optimal long-term preservation, consider freezing the bread in airtight containers or freezer bags. This technique reduces the risk of freezer burn and maintains the bread’s quality over a longer period. For optimal quality, consider freezing individual slices or portions in separate freezer bags. This allows for easier portioning when you are ready to use it.
Summary of Storage Tips
| Storage Type | Method | Duration | Notes |
|---|---|---|---|
| Fresh Bread | Cool completely on wire rack, then store in airtight container | 1-2 days | Keeps texture and freshness |
| Refrigerator | Store in airtight container | 3-5 days | Best for extending freshness |
| Freezer (Short Term) | Wrap tightly in plastic wrap or aluminum foil, place in freezer bag or container | Up to 3 months | Minimizes freezer burn, maintains quality |
| Freezer (Long Term) | Wrap tightly in plastic wrap or aluminum foil, place in freezer bag or container, consider freezing individual slices or portions | Over 3 months | Reduces freezer burn, maintains quality |
Visual Representation of Processes
Visual aids are crucial for understanding complex culinary procedures like bread making. Images effectively convey the nuances of each step, allowing readers to grasp techniques and troubleshoot potential problems. This section provides visual representations of mixing, kneading, and proofing stages, with detailed captions explaining their significance in the bread-making process.
Mixing the Dough
Visualizing the initial mixing stage is vital for achieving a consistent and workable dough. A successful dough requires a thorough incorporation of ingredients. A properly mixed dough will exhibit a smooth, elastic texture. This stage sets the foundation for subsequent steps. 
Image Caption: This image depicts the initial mixing stage of the dough. Note the consistent incorporation of ingredients. Use a wooden spoon or stand mixer to combine flour, yeast, water, and other ingredients. Observe the texture for signs of a well-mixed dough. A smooth, homogenous consistency is ideal.
Kneading the Dough
Kneading the dough is a critical step in developing gluten, which gives the bread its structure and elasticity. Proper kneading strengthens the gluten network, leading to a rise and a good texture. 
Image Caption: This image demonstrates the kneading process. A gentle yet firm kneading motion is necessary to develop the gluten. The image highlights the technique of folding and turning the dough. The dough should become smooth and elastic after sufficient kneading.
Proofing the Dough
Proofing is a crucial stage in bread-making. It allows the yeast to develop, producing carbon dioxide that creates the characteristic rise in the bread. 
Image Caption: This image shows the proofing stage. The dough is placed in a warm, draft-free environment to allow the yeast to activate and expand. Observe the dough rising gradually. The dough should double or triple in size during proofing. The image emphasizes the importance of maintaining a consistent temperature for optimal yeast activity.
Completed Bread Loaf
A well-executed bread-making process culminates in a beautiful, artisan-quality loaf. Visualizing the final product can be inspiring and motivating.
Image Caption: A perfectly baked loaf of bread. A golden-brown crust, a soft, airy interior, and an overall pleasing aesthetic indicate successful baking. This visual representation exemplifies the culmination of the entire bread-making process.

Conclusion
Nah, itulah tadi gambaran lengkap tentang Fleischmann active dry yeast bread recipe. Semoga penjelasan ini bisa membantu kamu bikin roti yang enak dan sempurna. Jangan lupa praktikkan langkah demi langkah, ya. Selamat mencoba dan happy baking!
FAQ Summary
Apakah ragi Fleischmann itu beda sama ragi instant?
Ragi Fleischmann itu ragi kering aktif, beda sama ragi instant. Ragi instant lebih cepat prosesnya, sedangkan Fleischmann perlu proses ‘aktivikasi’ dulu. Tapi, hasil akhirnya tetap empuk dan enak kok!
Gimana cara ngecek roti udah matang atau belum?
Cara paling gampang ngecek roti matang itu dengan ngetok-ngetok bagian bawahnya. Kalau bunyinya hollow, berarti roti udah matang. Kalau masih bunyi padat, berarti masih perlu dipanggang lagi.
Kalau adonan roti terlalu keras, apa yang harus dilakukan?
Kalau adonan roti terlalu keras, bisa jadi karena kurangnya air atau terlalu lama diuleni. Coba tambahkan air sedikit demi sedikit, lalu uleni lagi sampai adonan lembut dan elastis. Perhatikan konsistensinya, ya!
Apa saja tambahan yang bisa ditambahkan ke adonan roti selain bumbu?
Selain bumbu, kamu bisa menambahkan berbagai macam hal, seperti keju parut, potongan buah kering, atau biji-bijian. Tambahkan sesuai selera dan kreativitas kamu!
